前言
pigeon是大众点评内部一直在使用的rpc框架,同时带有服务治理的功能。
组件是使用zookeeper + netty + jetty完成。
现在也已经开源
但是开源似乎做的不用心,可能也是看dubbo很火热,pigeon没人用
而且pigeon和点评内部的一点闭源的框架联系紧密,所以用的人并不多(反正我是一个没看到)。
使用
demo
Server端
pigeon是与spring进行了很重的耦合的,如果要使用pigeon,那么必须使用spring框架。
如果要暴露我们的服务
比如创建一个简单的UserService接口和实现。
1 | public interface UserService { |
由于pigeon的服务注册和发现是依赖zookeeper的,我们还需要装载一个zookeeper
在resources文件夹下创建config文件夹,在config文件夹下创建pigeon.properties文件
在其中写上zookeeper的ip和端口1
pigeon.registry.address=localhost:2181
同时为了区分服务,需要给我们的服务起一个名字
在sources的META-INF文件夹的app.properties里写上1
pigeon.registry.address=localhost:2181
如果使用typical的方法声明服务的话,我们创建一个spring的配置文件,假设就叫spring.xml1
2
3
4
5
6
7
8
9
10<bean id="userServiceImpl" class="cc.lovezhy.service.UserServiceImpl"/>
<bean class="com.dianping.pigeon.remoting.provider.config.spring.ServiceBean" init-method="init">
<property name="services">
<map>
<entry
key="cc.lovezhy.service.UserService" value-ref="userServiceImpl"/>
</map>
</property>
</bean>
这时候,就可以直接用Main方法启动了1
2
3
4
5
6
7public class Main {
public static void main(String[] args) throws Exception {
SpringContainer container = new SpringContainer("classpath*:/META-INF/spring.xml");
container.start();
System.in.read();
}
}
当然如果你想要部署到tomcat中也是可以的。
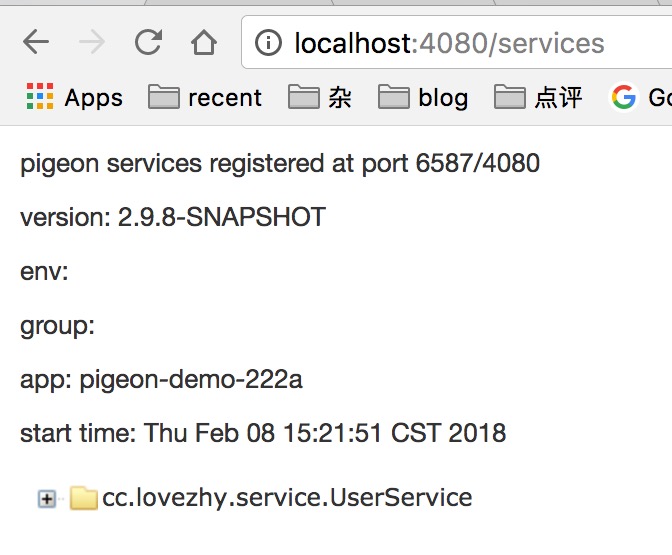
同时默认在localhost:4080/services上我们可以看到当前我们暴露出去的服务
并且可以调用。
client端
client端只需要包含服务的接口就行了。
所以service端的代码编写都是分模块写的,一个模块专门提供DTO和service接口
打包成maven供其他人使用。
然后具体的实现我们再在另外一个模块里写。
resources和META-INF的内容和服务端一样的。
就是在bean的声明的时候,我们需要这样1
2
3
4<bean id="userService" class="com.dianping.pigeon.remoting.invoker.config.spring.ReferenceBean"
init-method="init">
<property name="interfaceName" value="cc.lovezhy.service.UserService"/>
</bean>
然后我们就可以在Main方法中引用了
1 | public class Main { |
配置客户端调用模式
在pigeon内部,客户端调用远程服务有4种模式
sync同步future异步callback也是异步,只是通过回调的方式来处理结果oneway不需要回复
例如spring编程方式下只需要配置callType属性:
1 | <bean id="babyAccountService" class="com.dianping.pigeon.remoting.invoker.config.spring.ReferenceBean" init-method="init"> |
官方文档解释的很清楚了所有的选项。1
2
3
4
5
6
7
8
9
10
11
12
13
14
15
16
17
18
19
20<bean id="echoService"
class="com.dianping.pigeon.remoting.invoker.config.spring.ReferenceBean"
init-method="init">
<!-- 服务全局唯一的标识url,默认是服务接口类名,必须设置 -->
<property name="url" value="http://service.dianping.com/demoService/echoService_1.0.0" />
<!-- 接口名称,必须设置 -->
<property name="interfaceName" value="com.dianping.pigeon.demo.EchoService" />
<!-- 超时时间,毫秒,默认5000,建议自己设置 -->
<property name="timeout" value="2000" />
<!-- 序列化,hessian/fst/protostuff,默认hessian,可不设置-->
<property name="serialize" value="hessian" />
<!-- 调用方式,sync/future/callback/oneway,默认sync,可不设置 -->
<property name="callType" value="sync" />
<!-- 失败策略,快速失败failfast/失败转移failover/失败忽略failsafe/并发取最快返回forking,默认failfast,可不设置 -->
<property name="cluster" value="failfast" />
<!-- 是否超时重试,默认false,可不设置 -->
<property name="timeoutRetry" value="false" />
<!-- 重试次数,默认1,可不设置 -->
<property name="retries" value="1" />
</bean>
ReferenceBean的获取,init方法
这个我也画了一个简单的图,不过省略了很多细节部分,在InvokerBootStrap部分和Serializer.proxyRequest部分省略了很多。

下面具体看代码。
在我们声明bean的时候还带有一个init-method参数init-method="init"
意思是在这个bean创建的时候还会调用一下ReferenceBean的init方法。
在init方法中
1 | public void init() throws Exception { |
1 | InvokerConfig<?> invokerConfig = new InvokerConfig(this.objType, this.url, this.timeout, this.callType, |
InvokerConfig参数
Class<T> serviceInterface接口的Class类String url服务全局唯一的标识url,感觉有了serviceInterface就够了String version版本?byte callMethod就是call的方式,sync还是future之类,但是是byte类型的,1代表sync等String callTypecallType就是callMethod的Stringbyte serialize序列化方式,默认是hessianint timeout超时时间InvocationCallback callback设置了callback模式才有String suffixString loadbalance负载均衡的策略设置String routePolicy路由的规则RoutePolicy routePolicyObjboolean timeoutRetryString clusterint retries失败了重试的次数String vipint maxRequestsString protocolMap<String, InvokerMethodConfig> methodsClassLoader classLoaderString secretString remoteAppKeyObject mock
上面还提到一个服务降级的问题,这个我们之后再说。
从上面看到,得到的service是从ServiceFactory这个类直接得到的。
在getService的时候直接get了
1 | //ServiceFactory这个类,主要就是管理service的加载,发布和获取的。 |
默认的话是建一个DefaultServiceProxy
它的调用是调用了父类的1
2
3
4
5
6public final class DefaultServiceProxy extends AbstractServiceProxy {
public <T> T getProxy(InvokerConfig<T> invokerConfig) {
return super.getProxy(invokerConfig);
}
}
在AbstractServiceProxy中1
2
3
4
5
6
7
8
9
10
11
12
13
14
15
16
17
18
19
20
21
22
23
24
25
26
27
28
29
30
31
32
33
34
35
36
37
38
39
40
41
42
43
44
45
46
47
48
49
50
51
52
53//这个其实是个缓存的map,看下面的get过程中有个加锁的过程
protected final static Map<InvokerConfig<?>, Object> services = new ConcurrentHashMap<InvokerConfig<?>, Object>();
public <T> T getProxy(InvokerConfig<T> invokerConfig) {
//...省略好多好多
Object service = null;
service = services.get(invokerConfig);
if (service == null) {
//这个锁,好像用的guava中一个东西,提供和String.intern相同的作用但是不会占用老年代空间?
//有时间再研究研究
synchronized (interner.intern(invokerConfig)) {
service = services.get(invokerConfig);
if (service == null) {
try {
//参见另外一篇文章
InvokerBootStrap.startup();
//下面这句就调用AbstractSerializer中的proxyRequest动态生成一个代理类
service = SerializerFactory.getSerializer(invokerConfig.getSerialize()).proxyRequest(invokerConfig);
if (StringUtils.isNotBlank(invokerConfig.getLoadbalance())) {
LoadBalanceManager.register(invokerConfig.getUrl(), invokerConfig.getSuffix(), invokerConfig.getLoadbalance());
}
} catch (Throwable t) {
throw new RpcException("error while trying to get service:" + invokerConfig, t);
}
try {
//配置地域策略,默认的是autoSwitch
routePolicyManager.register(invokerConfig.getUrl(), invokerConfig.getSuffix(),
invokerConfig.getRoutePolicy());
} catch (Throwable t) {
throw new RouteException("error while setup region route policy: " + invokerConfig, t);
}
// watch service config
try {
serviceConfigManager.register(invokerConfig.getUrl());
} catch (Throwable t) {
throw new ConfigException("error while trying to watch service config: " + invokerConfig, t);
}
try {
ClientManager.getInstance().registerClients(invokerConfig);
} catch (Throwable t) {
logger.warn("error while trying to setup service client:" + invokerConfig, t);
}
//加到Map缓存里
services.put(invokerConfig, service);
}
}
}
return (T) service;
}
在InvokerBootStrap.startup()中1
2
3
4
5
6
7
8
9
10
11
12
13
14
15
16
17
18
19
20
21//有很多的init方法,说明都是和invoke相关的一些配件。
//这是处理调用超时问题的,把一个InvocationTimeoutListener跑在一个线程中
ServiceInvocationRepository.getInstance().init();
//初始化那个proxy的handle,下面会提到
InvokerProcessHandlerFactory.init();
//序列化工厂的初始化,默认支持很多序列化方式
SerializerFactory.init();
//负载均衡调度的初始化,默认支持四种
LoadBalanceManager.init();
//Region策略,就是分地域的策略,如果是北京上海都有服务,那么调用哪一边的问题。
RegionPolicyManager.INSTANCE.init();
Monitor monitor = MonitorLoader.getMonitor();
if (monitor != null) {
monitor.init();
}
isStartup = true;
得到服务的唯一标志,如果不指定url的话,默认就是接口的全称。1
2
3
4
5ServiceFactory.getServiceUrl(invokerConfig);
public static <T> String getServiceUrl(InvokerConfig<T> invokerConfig) {
String url = invokerConfig.getServiceInterface().getCanonicalName();
return url;
}
service代理对象1
2
3
4
5
6
7
8
9
10//proxyRequest得到一个proxy的对象
public abstract class AbstractSerializer implements Serializer {
public Object proxyRequest(InvokerConfig<?> invokerConfig) throws SerializationException {
//第一个参数是ClassLoader,第二个参数是interface的数组,第三个参数是Proxy类
return Proxy.newProxyInstance(ClassUtils.getCurrentClassLoader(invokerConfig.getClassLoader()),
new Class[] { invokerConfig.getServiceInterface() }, new ServiceInvocationProxy(invokerConfig,
InvokerProcessHandlerFactory.selectInvocationHandler(invokerConfig)));
}
}
1 | //这里的handler是连接远程调用的桥梁 |
当我们调用其他的方法时,其实是在1
handler.handle(new DefaultInvokerContext(invokerConfig, methodName, parameterTypes, args)
这里面进行处理的。
这里的handle是1
private ServiceInvocationHandler handler;
在InvokerProcessHandlerFactory中得到一个实例
//这里应该是最重要的部分了1
2
3
4
5
6
7
8
9
10
11
12
13
14
15
16
17
18
19
20
21
22
23
24
25
26
27
28
29
30
31
32
33
34
35
36
37
38
39
40
41
42
43
44
45
46
47
48
49
50
51
52
53
54
55
56
57
58
59
60
61public final class InvokerProcessHandlerFactory {
private static List<InvocationInvokeFilter> bizProcessFilters = new LinkedList<InvocationInvokeFilter>();
private static ServiceInvocationHandler bizInvocationHandler = null;
private static volatile boolean isInitialized = false;
//这里进行了一个责任链的处理,类似于netty的那种
//在调用前进行日志,权限之类的分析。
//最后的RemoteCallInvokeFilter才是真正调用我们想要的方法
//初始化在之前就进行了,见上
public static void init() {
if (!isInitialized) {
if (Constants.MONITOR_ENABLE) {
registerBizProcessFilter(new RemoteCallMonitorInvokeFilter());
}
//trace 监控信息
registerBizProcessFilter(new TraceFilter());
//服务降级
registerBizProcessFilter(new DegradationFilter());
registerBizProcessFilter(new ClusterInvokeFilter());
//网关,统计流量啥的
registerBizProcessFilter(new GatewayInvokeFilter());
registerBizProcessFilter(new ContextPrepareInvokeFilter());
//安全验证
registerBizProcessFilter(new SecurityFilter());
//通过Netty调用
registerBizProcessFilter(new RemoteCallInvokeFilter());
bizInvocationHandler = createInvocationHandler(bizProcessFilters);
isInitialized = true;
}
}
public static ServiceInvocationHandler selectInvocationHandler(InvokerConfig<?> invokerConfig) {
return bizInvocationHandler;
}
({ "rawtypes" })
private static <V extends ServiceInvocationFilter> ServiceInvocationHandler createInvocationHandler( List<V> internalFilters) {
ServiceInvocationHandler last = null;
List<V> filterList = new ArrayList<V>();
filterList.addAll(internalFilters);
//创建一个调用链
for (int i = filterList.size() - 1; i >= 0; i--) {
final V filter = filterList.get(i);
final ServiceInvocationHandler next = last;
last = new ServiceInvocationHandler() {
("unchecked")
public InvocationResponse handle(InvocationContext invocationContext) throws Throwable {
InvocationResponse resp = filter.invoke(next, invocationContext);
return resp;
}
};
}
return last;
}
public static void registerBizProcessFilter(InvocationInvokeFilter filter) {
bizProcessFilters.add(filter);
}
}
在RemoteCallInvokeFilter中invoke方法中,
调用的是InvokerUtils的方法1
response = InvokerUtils.sendRequest(client, invocationContext.getRequest(), future);
1 | public static InvocationResponse sendRequest(Client client, InvocationRequest request, Callback callback) { |
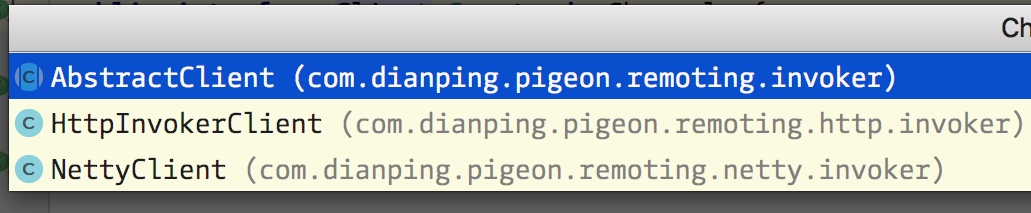
client的实现有两种,一个是Tcp的还有一个是Http的,pigeon两种都支持。
好像一般的调用是调用的tcp的方案,然后在4080/services查看和调用的是http的协议。
在Netty的实现中的doWrite方法,其实就是调用了channel的write0方法1
2
3
4
5
6
7
8
9
10
11
12
13
14
15
16
public InvocationResponse doWrite(InvocationRequest request) throws NetworkException {
NettyChannel channel = null;
try {
channel = channelPool.selectChannel();
ChannelFuture future = channel.write0(request);
afterWrite(request, channel);
if (request.getMessageType() == Constants.MESSAGE_TYPE_SERVICE
|| request.getMessageType() == Constants.MESSAGE_TYPE_HEART) {
future.addListener(new MessageWriteListener(request, channel));
}
} catch (Exception e) {
throw new NetworkException("[doRequest] remote call failed:" + request, e);
}
return null;
}
至此,代理bean的创建和invoke的流程大概就理清楚了。
但是其实它是怎么和zookeeper沟通拿到service的呢。
我猜想肯定是从那条责任链的某个地方中取得的,于是进行了一番苦苦查找。
在ClusterFactory的select中,默认是返回FailfastCluster,在它的invoke方法中
1 | Client remoteClient = clientManager.getClient(invokerConfig, request, null); |
有这句话。
这个Client默认是NettyClient。
如果我们在仔细看一下ClientManager的构造函数
1 | private ClientManager() { |
这里其实启动了一个ProviderAvailableListener。
这个类和RegisterManager关系密切,而RegisterManager则是掌管和zookeeper沟通的,由此不难看出,这里的service就是从这儿得到的。
服务端集群策略
在ClusterInvokeFilter中进行的配置
failfast- 调用服务的一个节点失败后抛出异常返回,可以同时配置重试timeoutRetry和retries属性failover- 调用服务的一个节点失败后会尝试调用另外的一个节点,可以同时配置重试 timeoutRetry和retries属性failsafe- 调用服务的一个节点失败后不会抛出异常,返回null,后续版本会考虑按配置默认值返回forking- 同时调用服务的所有可用节点,返回调用最快的节点结果数据。
可以通过配置forkingSize,指定最多调用的节点数(pigeon2.10.3及以上版本通过xml配置forkingSize,其余版本可以通过lion配置{appkey}.pigeon.invoker.forking.size)hedged- 发出第一个请求后,如果hedgedDelay时间内没有返回,会向其他节点发送第二个请求,返回最先返回的结果数据
ServiceBean的注册

(画了我好久的图)
具体的流程和ReferenceBean的获取其实差不了太多。